VIDEO SERIES: PERFECTING YOUR POUR
Shop Products Used in This Video
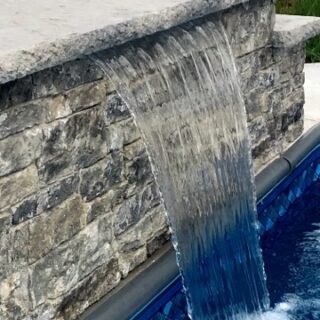
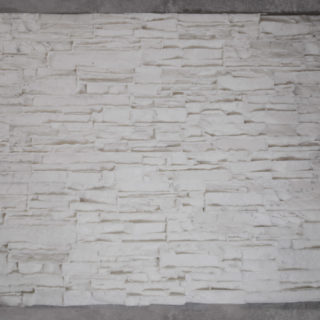
Masonry Panel Molds
OasisStone™ Tight Stack Ledgestone 96″ x 40″ Bar Height Panel Mold

Concrete Mold Release
Welcome to the first in our series of OasisStone™ Masonry Panel & Countertop Mix training videos. These videos are designed in a way that you can refer back to the processes and methodologies presented in our videos to train new employees and brush up on techniques. This video will cover perfecting your pour to achieve superior results in your finished masonry panels.
Before we begin, make sure your workers are outfitted with the proper safety gear. This includes protective eyewear, gloves and dust masks. Be aware of your surroundings and ensure your work area is free of trip hazards such as electrical cables before you begin.
PRODUCTS NEEDED
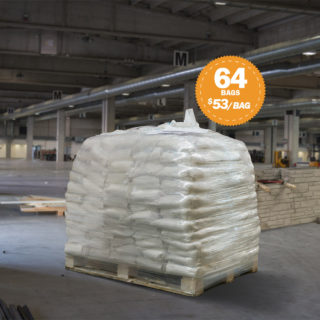
For optimal results that your customers will love, it is recommended that you use the Oasis Stone Works line of products that have been rigorously tested to work with our mix formulation. The products you’ll need for your pour include OasisStone™ Masonry Panel & Countertop Mix, Muriatic Acid, Baking Soda, OasisStone™ Mold Release and silicone caulk or clay.
EQUIPMENT NEEDED
The equipment you’ll need on hand include a dual paddle mixer, handheld temperature gun, bucket heater (if pouring in colder climates), garden sprayer, 2x 70 quart heavy-duty multi-purpose buckets, 10-quart graduated measuring bucket, 10mil plastic sheeting, and hand float.
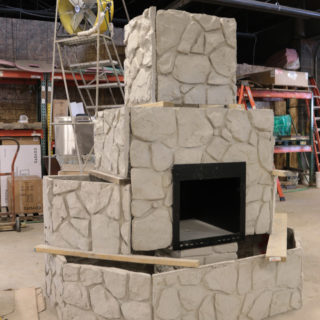
MOLD FRAME
For easy storage and more flexible pouring options, our panel molds do not include a built-in lip. A simple, reusable frame can be quickly fashioned using wood or PVC materials. We recommend PVC as it has much lower moisture absorption and will allow your panel or countertop to cure more evenly.
CLEANING YOUR MOLD
Once your mold and frame are in place, it is important your mold is free of dust and debris. Use a leaf blowers to remove large particles and a shop vac with brush attachment to make sure your mold is free of any dust. Once you’re certain the mold is clean, use muriatic acid and a hand brush to dissolve any solids left on the mold. As final prep, be sure to rinse your mold thoroughly with backing soda and clean water to remove any leftover muriatic acid.
APPLYING MOLD RELEASE
Once clean and dry, use your garden sprayer to spray a light, even coat of OasisStone™ Mold Release onto the surface of the mold. This step helps to eliminate bug holes and worm holes often seen in other finished panels. Use a 2-inch brush to get the mold release into all the nooks and crannies of your mold and be sure to use a clean paper towel to absorb any puddling that may occur. Let mold release fully dry and adhere to the surface of the mold which usually takes around 30 minutes. While waiting for the mold release to dry, use your silicone caulk to fill in any visible gaps between the mold and the edge of your frame.
UNDERSTANDING THE COMPONENTS OF THE POUR
An incredibly important step in the pouring process is making sure the water you’re using is as free of heavy metals and minerals as possible and at a consistent temperature of 85°F when you’re ready to start mixing. If you know your water is heavily laden with iron or calcium, it is best to use distilled water in our mix to achieve optimum results.
With our 10’ long x 40” inch high, bar-height panels, you can expect to use 7 bags of OasisStone™ Mix. We recommend a multi-layer process with the first layer evenly covering your mold surface and subsequent pours providing your panel depth. Compared to competitor mixes, OasisStone™ Mix has a consistency similar to self-leveling concrete which helps evenly fill the relief profile of your mold. The consistency will be very similar to a loose cake batter. Be patient and mix no more than two bags at a time. While 2 people are recommended, our molds can be poured by one employee with proper preparation.
If pouring a panel that has a highly varied relief profile, such as our Ledgestone mold, it is recommended your panel be poured on a vibration table to eliminate any chance of worm holes and pitting.
POURING YOUR PANEL
To begin, fill one of your 70 quart buckets with 10 gallons of water, being sure the bucket is first cleaned and rinsed. Use a bucket heater in a cooler climate or ice in a warmer climate to get your mix water to an even 85°F, tested with your handheld temperature gun. When your water is ready, fill your 10-quart measuring bucket to 196oz. You’ll be using 196oz of water per one 45lb bag of OasisStone™ mix.
Mixing half a bag of mix at a time, use your paddle mixer to mix a total of 2 bags and 392oz of your 85°F water until you get a mix consistency similar to loose cake batter. As the chemical reaction takes place between the mix and the water, the mix will have a tendency to warm up. For optimal results, use your handheld temperature gun and wait until your mix is as close to 65°F as possible for your pour.
When you’re ready, move around your mold, pouring as you go to get an even and consistent first layer. Scrape as much of the reminder out of the bucket as you can and begin pushing the material with your gloved hands into the frame edges and into the relief surfaces of the mold. Achieving full surface coverage on our highly varied relief molds, such as our Ledgestone mold, may not be achievable on the first layer pour, which is OK.
Repeat this process until all 7 bags of OasisStone™ mix have been poured into your mold. At this point, use a hand float to achieve an even, level surface. This is not a finishing process, but instead will make your mold a more consistent thickness, easier to cut, and easier to join corners. We highly recommend pouring your panel on a vibration table to eliminate any trapped bubbles from creating worm holes or pitting in your end product.
CURING PROCESS
Loosely cover your mold with 10 mil plastic sheeting to help the panel evenly cure. Depending on environmental factors, your panel should be cured and ready to release from your mold in roughly 4-6 hours. In extremely cold environments, use heated blankets to help increase curing time.
DE-MOLDING PROCESS
We recommend at least 4 employees be present during mold release. Our panels, with molds attached, weigh over 400lbs and extreme care should be taken by employees to make sure they’re safe and comfortable with the de-molding procedure.
Remove the frame edge from your panel and use foam or another soft buffer to stand your panel on it’s long end. Working from the top corners down, gently peel the mold away from the finished panel. Place the panel on supports so that the panel is resting on its long end and air is allowed to fully circulate around the panel.
WRAP-UP
The more your employees work with our OasisStone™ Masonry Panel & Countertop Mix, the quicker and easier their pours will progress. If your employees are struggling with this process, we have a team in place ready to help. Call us today and we’ll help you perfect your pour and elevate your team to the next level of masonry panel construction.